Planting bare-root perennials in pots is a highly effective way to ensure healthy establishment, give young plants a head start, and extend planting flexibility regardless of climate or garden readiness. Here’s a detailed step-by-step guide—complete with preparation, best practices, aftercare, and troubleshooting—to help gardeners succeed with bare-root perennials in containers.longfield-gardens+2
Why Choose Bare-Root Perennials and Pots?
Bare-root perennials arrive dormant, without soil, making them cost-effective and environmentally friendly for shipping. Potting up provides greater control over soil, moisture, and placement—ideal if outdoor conditions are inhospitable, or if the garden isn’t ready.gardenbetty+1
Gathering Supplies
To begin, assemble the essentials:
-
Healthy bare-root perennial
-
Clean pot (with drainage holes; size 2–3 times the root mass)
-
High-quality potting mix (peat-free if possible)
-
Soaking bucket
-
Scissors or pruners (for trimming broken roots)
-
Labels/tags (to identify varieties)
-
Watering can
-
Optional: Liquid kelp, compost, worm castings, slow-release organic fertilizerdevroomen+2
Step 1: Inspect and Prepare the Plant
As soon as the bare-root perennial arrives:
-
Unpack Promptly: Remove plastic and check for healthy, firm roots. Discard moldy or rotting tissue.
-
Rehydrate Roots: Soak the bare roots in lukewarm water for 30 minutes to 1 hour. For a vitality boost, add a splash of diluted liquid kelp or seaweed extract.farmerbailey+2
-
Prune if Necessary: Trim away damaged or excessively long roots but avoid aggressive cutting; aim for a balanced, fanned-out spread.
Step 2: Choose the Right Pot and Soil
-
Pot Selection: Choose a container several times larger than the root system. This allows roots to spread without crowding and supports good drainage.
-
Soil Quality: Fill halfway with a well-drained, fertile potting mix. Amend with compost, worm castings, or slow-release fertilizer for an added nutrient boost.gardenbetty+1
Step 3: Position and Plant
-
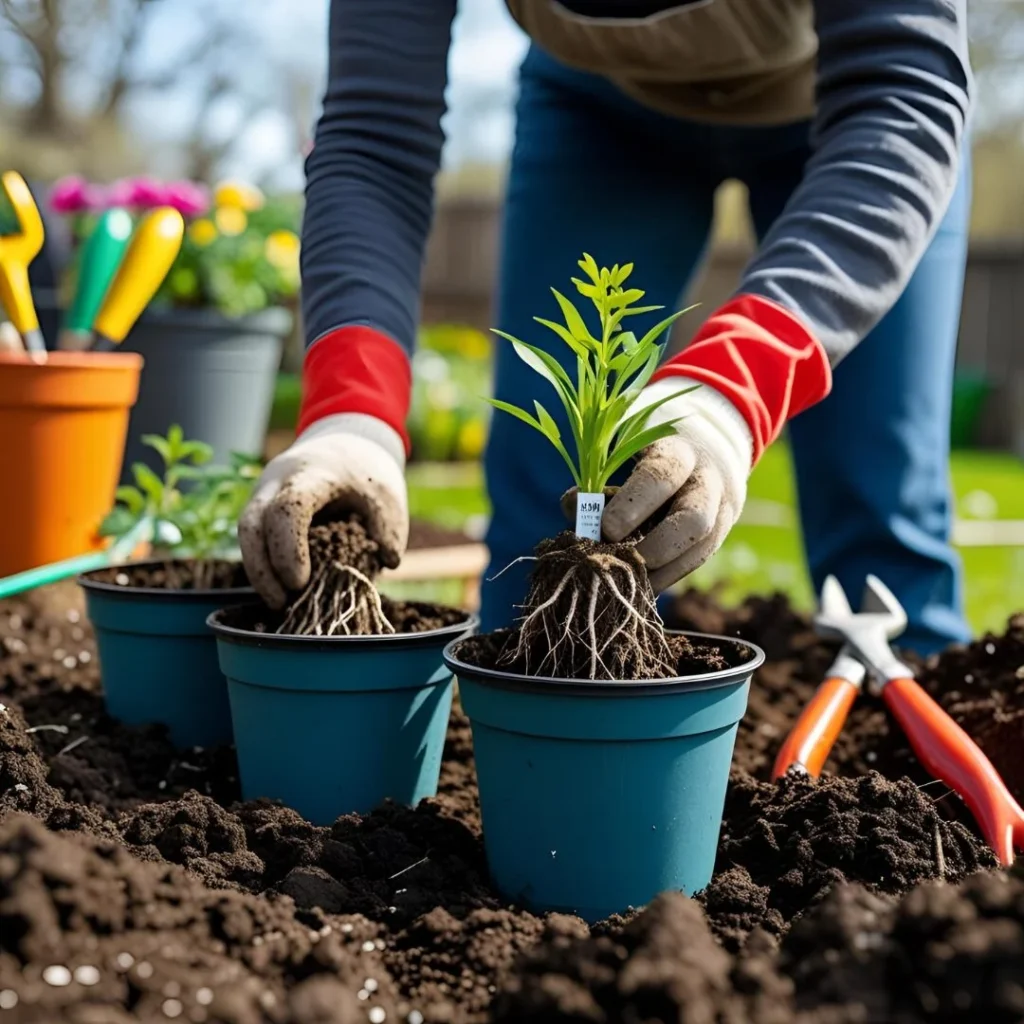
Depth Is Key: For most perennials, position the crown (where roots meet stems) just at or slightly below the soil surface. Planting too deep leads to rot, while too shallow risks drying.bluebellcottage+2
-
Spread Roots: Fan roots naturally over the soil in the bottom of the pot. Avoid bending or bunching them—this encourages even, healthy growth.
-
Backfill Carefully: Gently fill the remaining space with potting mix. While doing so, tap the pot to eliminate air pockets and ensure soil settles around the roots.hartley-botanic+1
Step 4: Water and Label
-
Thorough Initial Watering: Infiltrate all the way to the roots. The first drench is vital for settling the plant and bridging the transition from dormancy.longfield-gardens+1
-
Label the Pot: Record plant name and date to track progress—especially if potting up multiple varieties.
Step 5: Create an Ideal Growing Environment
-
Light: Place pots in a location offering at least 10 hours of bright light per day—under grow lights or near a south-facing window for indoor starts.longfield-gardens
-
Temperature: Keep containers in a frost-free area while plants establish, then gradually harden off to outdoor conditions.
-
Humidity: Avoid extremes. Maintain moderate moisture, but allow the top inch of soil to dry between waterings to prevent root rot.
Step 6: Aftercare in Pots
-
Watering: Keep the soil evenly moist, never waterlogged. Observe for new growth—typically in 2–4 weeks, as perennials “wake up.”
-
Fertilizing: Supplement with a half-strength balanced fertilizer or compost tea once new leaves appear.
-
Protection: Shield newly potted plants from harsh sun, heavy winds, and strong rain until robust foliage and roots develop.gardenbetty+1
-
Pest and Disease Monitoring: Watch for fungus, slugs, or gnats. Good hygiene minimizes trouble—clean pots, well-drained soil, and cautious watering are essential.
Step 7: Hardening Off and Transplanting (Optional)
Once all threat of frost has passed:
-
Gradual Acclimatization: Move pots outdoors to a sheltered, shaded location for a week, gradually introducing them to more sun and variable weather.
-
In-Garden Transfer: Bare-root perennials in pots can stay container-grown all season or be transplanted into the garden at any point during spring or autumn. Ensure transplanted roots remain at the correct depth for best vigor.bluebellcottage+1
Special Tips and Troubleshooting
-
Crown Planting Depth: Always check the specific requirements—in most cases, the crown sits flush with the soil, but some species differ.
-
Root Crowding: Give roots as much room as possible. If twined or tangled, gently tease them apart before planting.
-
Watering Woes: Overwatering is as harmful as underwatering. Only water when necessary; drainage holes are critical.hartley-botanic+2
-
Protection: Use mulch around the base (but not over the crown) to help conserve moisture after new growth emerges; this also helps control weeds and protect against temperature swings.agriframes+1
-
Label Everything: Especially useful for collections—document plant varieties and planting dates on waterproof labels.
Common Bare-Root Perennials for Pots
Bare-root perennials suited to potting include daylilies, hostas, peonies, hardy hibiscus, irises, astilbes, and many others. Some, like peonies and irises, demand shallow planting, while others tolerate deeper pots. Always consult variety-specific guidance for best results.longfield-gardens+1
Longevity and Reuse
Containers allow for portability, flexibility, and control. Well-cared-for perennials can thrive in pots for a season or more before being moved to permanent beds or overwintered in sheltered locations.
Step-by-Step Table Overview
| Step | Action | Key Tips |
|---|---|---|
| Preparation | Inspect, soak, trim roots | Use tepid water, add kelp for extra vigor |
| Pot/Soil | Choose large pot, prep mix | Amended, peat-free, add worm castings or compost |
| Plant | Spread roots, correct crown depth | Never cram; plant crown at/just below soil surface |
| Water | Initial heavy drench, then moderate | Always drain excess moisture |
| Grow | Light, warmth, protection | South-facing or grow light, shelter from wind |
| Aftercare | Water/fertilize, check for pests | Water only when needed, monitor for new leaves |
| Harden Off | Gradually transition outside | Increase sun/air exposure over 1 week |
| Transplant | Move to beds if desired | Handle carefully, keep crown level |
By following these detailed steps, even novice gardeners can successfully plant and nurture bare-root perennials in pots, enjoying robust and healthy plants for seasons to come.agriframes+4
- https://www.longfield-gardens.com/article/how-to-plant-bare-root-perennials/
- https://gardenbetty.com/plant-bare-root-perennials-pots/
- https://www.agriframes.co.uk/blogs/view-from-the-garden/bare-root-planting
- https://www.americanmeadows.com/content/planting-perennials
- https://www.rhs.org.uk/plants/types/perennials/planting
- https://www.bluebellcottage.co.uk/blog/bare-root-perennials-a-guide-to-planting
- https://hartley-botanic.com/magazine/bare-essentials/
- https://farmerbailey.com/blogs/farmer-bailey-blog/bare-root-care-tips
- https://www.devroomen.ca/files/files/bare-root-perenial-growing-info-2017-1-654c8ce1026d4.pdf

