Dividing perennials is one of the simplest and most effective ways to keep a garden healthy, vibrant, and thriving year after year. Over time, many perennial plants become crowded, root-bound, or less vigorous, resulting in smaller blooms and reduced productivity. Dividing these plants not only rejuvenates them but also offers an economical way to propagate new plants. This comprehensive guide discusses when and how to divide perennials, including detailed instructions and best practices for a successful division process.

Why Divide Perennials?
Perennials grow from the same root system each year and can become overcrowded as they spread. Common reasons to divide include:
-
Rejuvenation and increased vigor: Dividing stimulates new growth and improves flowering.
-
Controlling size: Keeps plants within desired boundaries and prevents crowding.
-
Propagation: Creates new plants for your garden or sharing.
-
Preventing disease: Dividing removes the older, weaker central parts that may harbor pests or fungal infections.
When to Divide Perennials: Timing Is Key
The best time to divide perennials depends largely on their blooming period and the local climate.
Spring Bloomers
-
Best divided in fall or early spring before new growth begins.
-
This timing allows plants to recover before blooming.
-
Examples: Daylilies, Shasta daisies, Iris (summer-blooming forms).
Summer and Fall Bloomers
-
Divide in early spring as growth begins or in early fall after blooming finishes.
-
Allows root establishment before winter or bloom season.
-
Examples: Coneflowers, Black-eyed Susans, Sedum.
Other Considerations
-
Avoid dividing during active flowering as this stresses the plant.
-
If dividing in hot summer months, do it on a cloudy, cooler day with immediate watering.
-
Fall divisions should be done at least 4-6 weeks before frost to allow new roots to establish.extension.unh+2
How to Divide Perennials: Step-by-Step Guide
1. Prepare the Plant and Location
-
Water plants the day before dividing to hydrate.
-
Prepare the new planting areas by loosening soil and adding compost or fertilizer.
2. Dig Up the Plant
-
Use a sharp spade or fork.
-
Dig a trench around the plant’s drip line (the edge of the foliage spread).
-
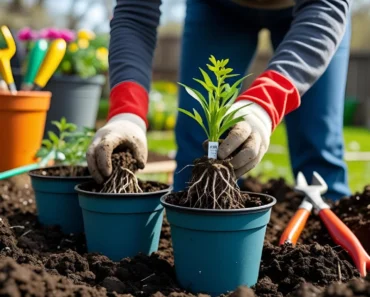
Carefully lift the entire root ball from the ground.
3. Divide the Root Ball
-
Shake off loose soil to expose roots.
-
Separate the root mass either by hand pulling, teasing apart with fingers, or using a sharp knife/spade for tougher roots.
-
Aim for divisions with 3-5 shoots and healthy roots.
-
Discard any damaged or diseased parts.
4. Trim and Clean
-
Remove dead foliage and trim back stems to reduce water loss.
-
Clean up the roots by cutting away woody centers for plants like iris.
5. Replant Immediately
-
Plant the divisions at the same depth as they were growing.
-
Space adequately based on species for air circulation and growth.
-
Water well and mulch to retain soil moisture.
6. Aftercare
-
Keep soil moist but not saturated.
-
Avoid fertilizing immediately; allow plants to focus on root establishment.
-
Protect from extreme sun and wind during recovery.extension.umn+2
Perennials That Benefit Most from Dividing
-
Hosta: Divides well in spring; rejuvenates foliage and vigor.
-
Daylilies (Hemerocallis): Every 4-5 years to maintain bloom quality.
-
Shasta Daisies: Promotes better flowering and reduces overcrowding.
-
Phlox: Controls spread and rejuvenates flower performance.
-
Coneflowers (Echinacea): Maintains health and size.
-
Sedum: Prevents center die-back and encourages new growth.
-
Bee Balm (Monarda): Redecreases disease susceptibility with dividing.
-
Iris (bearded): Best divided every 3 years to remove woody rhizomes.
-
Coral Bells (Heuchera): Keeps clumps healthy and manageable.rhs+2
Tips for a Successful Division
-
Use clean, sharp tools to minimize root damage and disease risk.
-
Avoid working in wet soil, which can compact and damage roots.
-
Choose a cool, overcast day or water well before and after dividing.
-
Label new plants if propagating varieties for future reference.
-
Mulch after planting to protect and retain moisture.
Troubleshooting Common Problems
-
Wilting after division: Water immediately, and provide shade until re-established.
-
Reduced blooming: Can be normal for first year post-division; allow recovery time.
-
Rot or disease: Ensure well-drained soil and avoid planting in the same spot as diseased plants.
-
Divisions too small: Avoid splitting too finely; divisions need sufficient roots/shoots.
Conclusion
Dividing perennials is a vital gardening practice that fosters plant health, enhances bloom quality, and expands your garden affordably. Timing divisions thoughtfully according to bloom cycles, preparing plants and planting sites properly, and following sharp, careful division techniques ensure vigorous, productive plants for seasons to come. Embracing division as part of your garden’s regular maintenance keeps perennials flourishing and the garden landscape vibrant year after year.provenwinners+2
- https://extension.unh.edu/blog/2021/03/when-should-i-divide-my-perennials
- https://www.rhs.org.uk/plants/types/perennials/dividing
- https://extension.umn.edu/planting-and-growing-guides/dividing-perennials
- https://www.themiddlesizedgarden.co.uk/the-honest-truth-about-how-to-divide-perennials/
- https://www.provenwinners.com/learn/dividing-perennials
- https://www.bhg.com/perennials-to-divide-in-fall-11803521
- https://www.finegardening.com/project-guides/gardening-basics/10-tips-on-dividing-perennial-plants
- https://www.gardenersworld.com/how-to/grow-plants/how-to-divide-plants/
- https://shop.iastate.edu/extension/home-garden/lawn-and-garden/gardening/rg319.html

